
The Best Fluffy Pancakes recipe you will fall in love with. Full of tips and tricks to help you make the best pancakes.
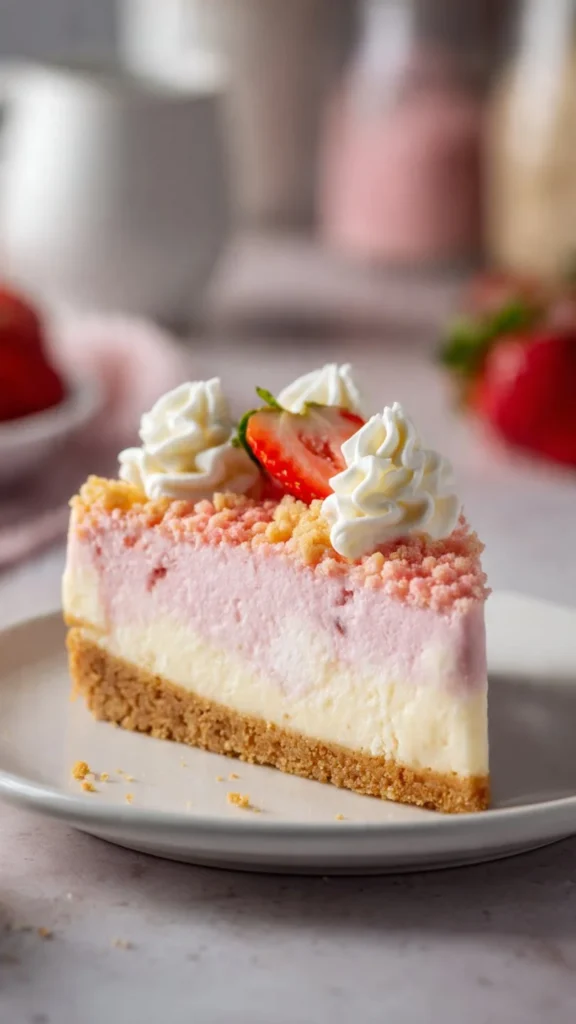
The Strawberry Crunch Cheesecake is a delicious treat that combines creamy and fruity flavors. This cheesecake is perfect for any occasion, whether you are celebrating a birthday, gathering with family, or just treating yourself on a cozy evening. The crunchy topping adds a fun twist, while the strawberries bring a burst of color and freshness.
Why You Will Love This Recipe
This recipe is perfect for anyone looking for a stunning dessert that doesn’t take all day to make. It’s easy enough for a weekday treat, yet impressive enough for special occasions. You’ll love how the creamy filling pairs beautifully with the crispy topping. Plus, everyone in the family will enjoy it—kids and adults alike!
Preparing Strawberry Crunch Cheesecake
Ingredients
- Cream Cheese
- Sugar
- Eggs
- Sour Cream
- Vanilla Extract
- Graham Crackers
- Butter
- Strawberries
- Strawberry Gelatin or Sauce
- Golden Oreos
- Freeze-Dried Strawberries
- Whipped Cream (optional)
Directions
- Start by crushing the graham crackers in a bowl. Mix them with melted butter and sugar until well combined.
- Press this mixture into the bottom of a springform pan to create a crust. Bake for a few minutes to set it.
- Next, beat the cream cheese in a mixing bowl until it’s smooth. Add in the sugar, eggs, vanilla, and sour cream. Mix gently until everything is combined. Pour this filling over the cooled crust.
- Bake the cheesecake in a water bath until the center is slightly wobbly. Let the cheesecake cool slowly before refrigerating it to set.
- While it’s chilling, simmer some strawberries with gelatin or sauce until it thickens. Let it cool, then spread it over the chilled cheesecake.
- For the topping, pulse Golden Oreos and freeze-dried strawberries into crumbs. Mix these with a little butter and press them onto the top and sides of the cheesecake.
- Chill the finished cheesecake for at least 4 hours, or overnight. When ready to serve, chill for 10 minutes before slicing.
How to Serve Strawberry Crunch Cheesecake
This cheesecake is best served chilled. You can slice it into pieces and garnish with extra whipped cream, fresh strawberries, or a drizzle of strawberry sauce on each plate. It’s an eye-catching dessert that will impress your guests!
How to Store Strawberry Crunch Cheesecake
Store any leftovers in the refrigerator. Make sure to cover the cheesecake with plastic wrap or store it in an airtight container. It should last for up to 3 days. If you want to keep it longer, you can freeze slices. Just wrap them well in plastic wrap and aluminum foil before placing them in the freezer.
Tips to Make Strawberry Crunch Cheesecake
- Make sure your cream cheese is softened before mixing; this helps to create a smoother filling.
- If you don’t have a springform pan, you can use a regular pie dish, but be careful when serving.
- Experiment with different toppings! You can try using chocolate shavings or other fruits if you like.
Variations
Feel free to switch up the toppings! You can use blueberries or raspberries instead of strawberries for a different flavor. Adding a layer of chocolate ganache on top can also bring a decadent touch.
FAQs
Can I use a different type of crust?
Yes, you can use any sturdy cookie crust. Chocolate cookies or even a nut-based crust would work well.
How do I know when the cheesecake is done baking?
The cheesecake is ready when the center slightly jiggles but is not liquid. It will continue to set as it cools.
Can I make this cheesecake ahead of time?
Absolutely! This cheesecake is perfect to make a day or two in advance, allowing the flavors to set and meld together nicely. Just make sure to store it in the fridge.
Strawberry Crunch Cheesecake
A delightful dessert that features a creamy filling paired with a crunchy topping, making it perfect for any occasion.
Ingredients
Method
Preparation
- Preheat the oven to 350°F (175°C).
- In a bowl, combine crushed Graham Crackers, melted butter, and sugar. Press the mixture into the bottom of a springform pan to create a crust.
- Bake the crust for about 10 minutes to set it.
Filling
- In a mixing bowl, beat the softened cream cheese until smooth.
- Add in sugar, eggs, vanilla, and sour cream. Mix gently until combined.
- Pour the cream cheese filling over the cooled crust.
Baking
- Bake the cheesecake in a water bath until the center is slightly wobbly, approximately 60 minutes.
- Let the cheesecake cool slowly before refrigerating it for at least 4 hours to set.
Topping
- While the cheesecake is chilling, simmer sliced strawberries with gelatin or sauce until it thickens. Let it cool before spreading it over the cheesecake.
- In a bowl, pulse together Golden Oreos and freeze-dried strawberries. Mix with melted butter and press onto the top and sides of the cheesecake.
Serving
- Chill the finished cheesecake for at least 4 hours or overnight. Before slicing, you can chill for an additional 10 minutes.
- Slice and serve the cheesecake cold, optionally garnished with whipped cream, fresh strawberries, or a drizzle of strawberry sauce.
Notes
Store any leftovers in the refrigerator, covered well. It will last for up to 3 days. For longer storage, you can freeze slices wrapped in plastic wrap and aluminum foil.