
The Best Fluffy Pancakes recipe you will fall in love with. Full of tips and tricks to help you make the best pancakes.
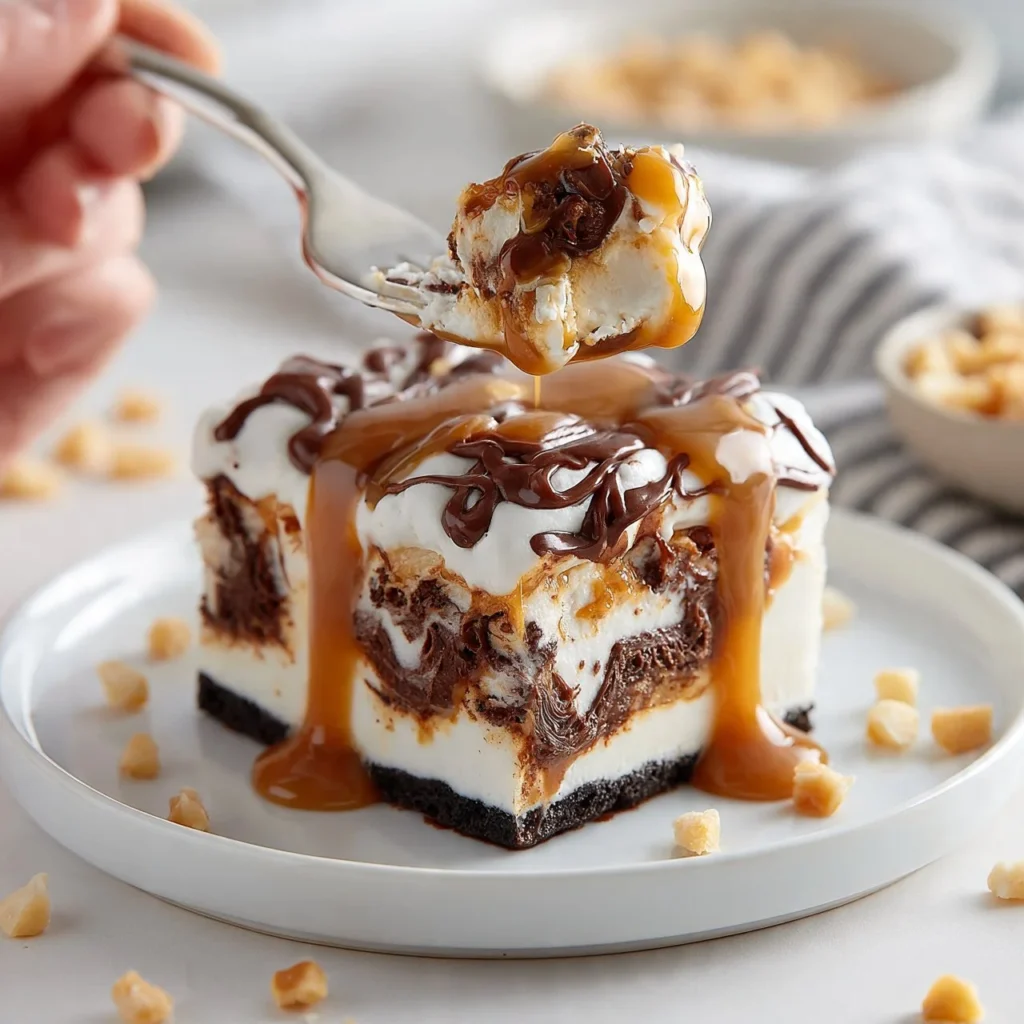
There’s something truly delightful about a dessert that combines chocolate, caramel, and nuts into a satisfying treat. No Bake Turtle Dream Bars are a sweet indulgence that will have you dreaming of your next bite. With layers of creamy chocolate pudding, a buttery Oreo crust, rich caramel, and topped with fluffy whipped cream, these bars are a crowd-pleaser. Best of all, they require no baking, making them an easy addition to any occasion.
Why Make This Recipe
No Bake Turtle Dream Bars are perfect for any dessert lover who craves something rich and sweet without the fuss of baking. They are quick to assemble, making them ideal for those weeknights when you want a treat but don’t have a lot of time. Whether you’re hosting a family gathering, a birthday party, or just a cozy evening at home, these bars deliver deliciousness without the stress. Plus, they look gorgeous on any table, making them a great choice for impressing guests.
Why You Will Love This Recipe
One of the best things about these bars is how simple they are to make. If you have kids, they will love helping crush the Oreos and layering the ingredients. This recipe checks all the boxes for being easy, fun, and delicious. With minimal prep and no oven required, you can whip these up in under 30 minutes, then let the fridge do the rest of the work. Perfect for hot days when you want dessert but don’t want to heat up the kitchen!
Preparing No Bake Turtle Dream Bars
Ingredients
- 25 Oreo cookies (for the crust)
- 1/2 cup butter (for the crust)
- 1 package chocolate pudding mix
- 2 cups milk (for pudding)
- 1 cup caramel sauce
- 1/2 cup pecans (chopped)
- Whipped cream (for topping)
Directions
- Start by crushing the Oreo cookies into fine crumbs. You can use a food processor or place them in a zippered bag and crush them with a rolling pin.
- Melt the butter and mix it with the crushed Oreos to form a crust. Press this mixture into a rectangular dish evenly.
- In a mixing bowl, prepare the chocolate pudding according to the package instructions, using the milk. Once mixed well, pour it over the Oreo crust.
- Drizzle the caramel sauce over the pudding layer, making sure to cover it evenly for a rich flavor in every bite.
- Next, sprinkle the chopped pecans on top. This adds a delicious crunch to balance the smooth pudding and caramel layers.
- Finally, spread the whipped cream over the pecans for a fluffy topping.
- Refrigerate your bars for at least 4 hours, or until they are set and chilled.
- When ready to serve, cut the bars into squares and enjoy!
How to Serve No Bake Turtle Dream Bars
These dessert bars are best served chilled right from the refrigerator. You can plate them elegantly for guests or enjoy them straight from the dish for a casual treat. For extra flair, consider adding a drizzle of additional caramel sauce or a sprinkle of chopped pecans on top just before serving. They pair wonderfully with a cup of coffee or a scoop of vanilla ice cream for that extra indulgence!
How to Store No Bake Turtle Dream Bars
Store any leftovers in an airtight container in the refrigerator. They will keep well for up to 4-5 days, allowing you to savor the sweet taste of Turtle Dream Bars throughout the week. Just be sure to separate layers with parchment paper if you stack them to prevent sticking.
Tips to Make No Bake Turtle Dream Bars
- Make sure to press the Oreo crust firmly into the dish to form a good base for the pudding.
- For a richer flavor, try adding a pinch of salt to the caramel sauce.
- You can swap out pecans for other nuts like walnuts or almonds if you prefer.
- Feel free to experiment with different flavors of pudding, such as vanilla or butterscotch.
Variations
While Turtle Dream Bars are delicious as they are, you can easily customize them. For a tropical twist, add shredded coconut on top or mix in some chopped dried fruit with the nuts. You could also layer in some sliced bananas or strawberries if you want a fruity addition within the bars.
FAQs
Can I make these bars ahead of time?
Absolutely! No Bake Turtle Dream Bars are perfect for make-ahead desserts. Just assemble them and refrigerate until you’re ready to serve.
What if I don’t have Oreo cookies?
If you don’t have Oreos, you can use any chocolate sandwich cookie. Just ensure they have a similar texture to get that great crust.
Can I freeze No Bake Turtle Dream Bars?
Yes, you can freeze them! Just cut them into bars and wrap them tightly in plastic wrap before placing them in an airtight container. To eat, allow them to thaw in the refrigerator for a few hours before serving.
No Bake Turtle Dream Bars
Delicious and indulgent layered dessert bars combining chocolate, caramel, and nuts, perfect for any occasion and requiring no baking.
Ingredients
Method
Preparation
- Crush the Oreo cookies into fine crumbs using a food processor or by placing them in a zippered bag and crushing with a rolling pin.
- Melt the butter and mix it with the crushed Oreos to form a crust. Press this mixture evenly into a rectangular dish.
Layering
- In a mixing bowl, prepare the chocolate pudding according to the package instructions, using the milk. Once mixed well, pour it over the Oreo crust.
- Drizzle the caramel sauce over the pudding layer, covering it evenly.
- Sprinkle the chopped pecans on top.
- Spread the whipped cream over the pecans.
Chilling
- Refrigerate for at least 4 hours, or until the bars are set and chilled.
- When ready to serve, cut the bars into squares and enjoy!
Notes
Store leftovers in an airtight container in the refrigerator for up to 4-5 days. Separate layers with parchment paper to prevent sticking.